If you’re just getting started in Dubsado, one of the very first things you’ll want to set up is your lead capture form in Dubsado. This form is the entry point for your clients, and it’s the backbone of how your account stays organized.
In this post, I’ll show you exactly how to set up a lead capture form in Dubsado so you can capture the right information, keep your projects tidy, and make the most of Dubsado’s smart features.
Why Your Lead Capture Form Matter
This is the first impression of your business to your potential clients. It’s the gateway that connects your inquiries to the rest of your Dubsado system. Done right, it ensures:
- All information is mapped correctly to client and project records.
- You can personalize emails with smart fields (no more copying and pasting).
- Your projects stay organized from the very beginning.
When your form is set up properly, every piece of client information automatically flows into the right spot. That means less manual work for you and a smoother experience for your clients.
How to Set Up a Lead Capture Form in Dubsado
Here’s a step-by-step breakdown of the process of setting up forms in Dubsado:
1. Start with a Simple Layout
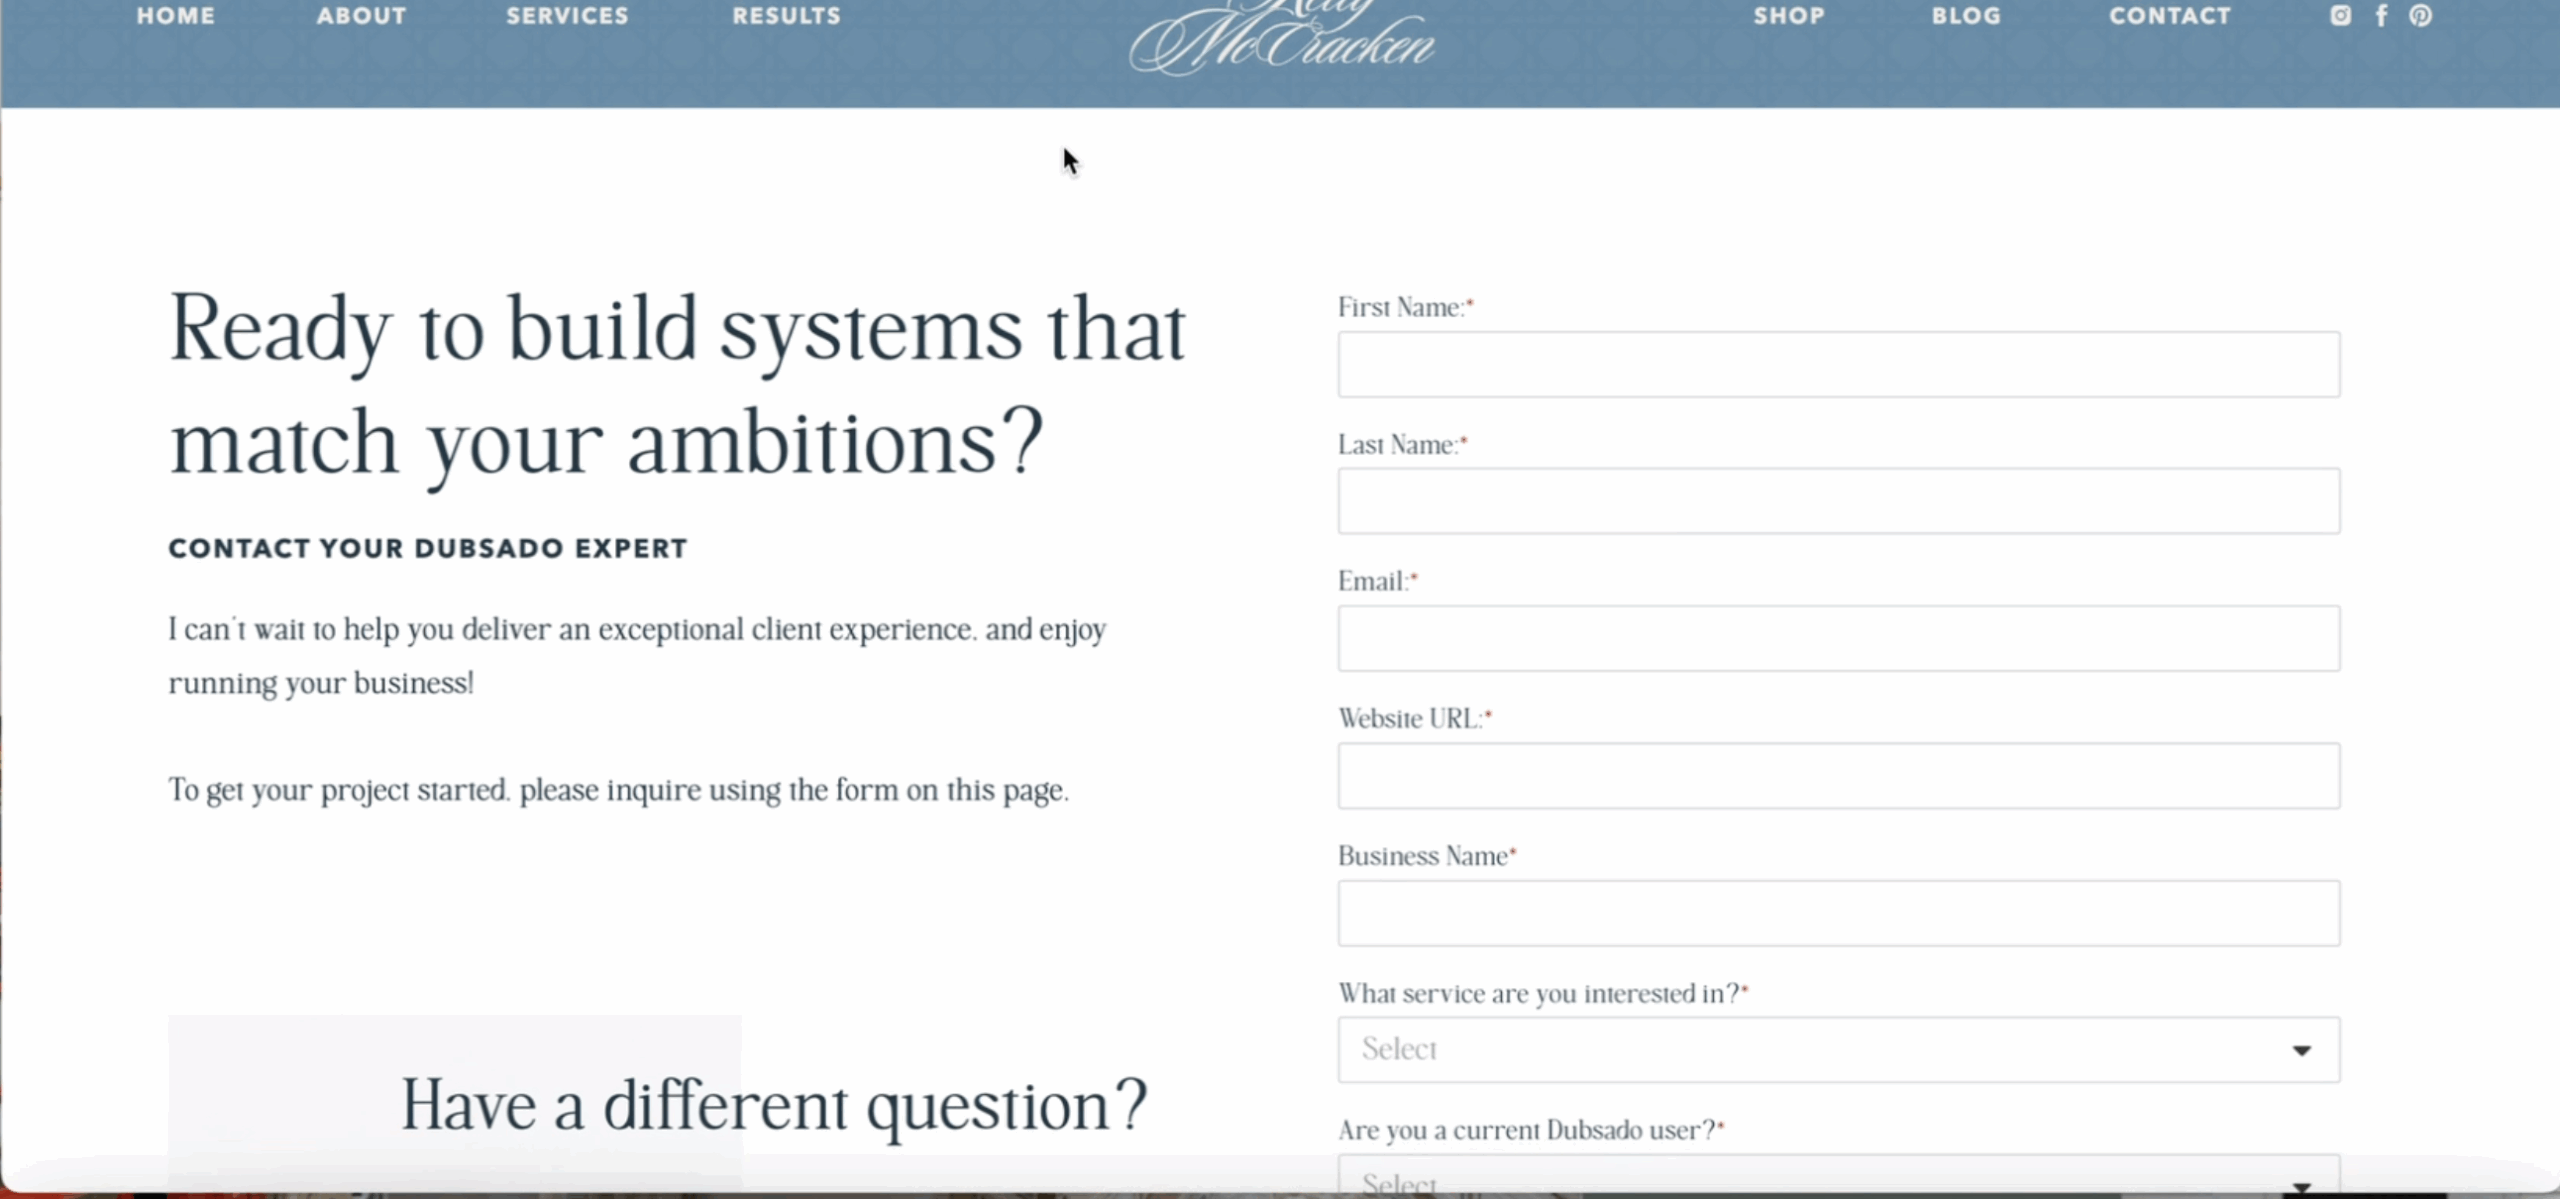
In Dubsado, open your Forms tab and create a new Lead Capture form. Keep the design clean and simple. I recommend not adding any images for styling. When embedded on your website, the form will naturally take on your site’s styling. You’ll share your form in one of two ways:
- Embed code (recommended): Copy and paste into a code block on your site’s contact page.
- Direct link: A standalone URL you can share directly.
2. Use Containers for Mobile-Friendly Design
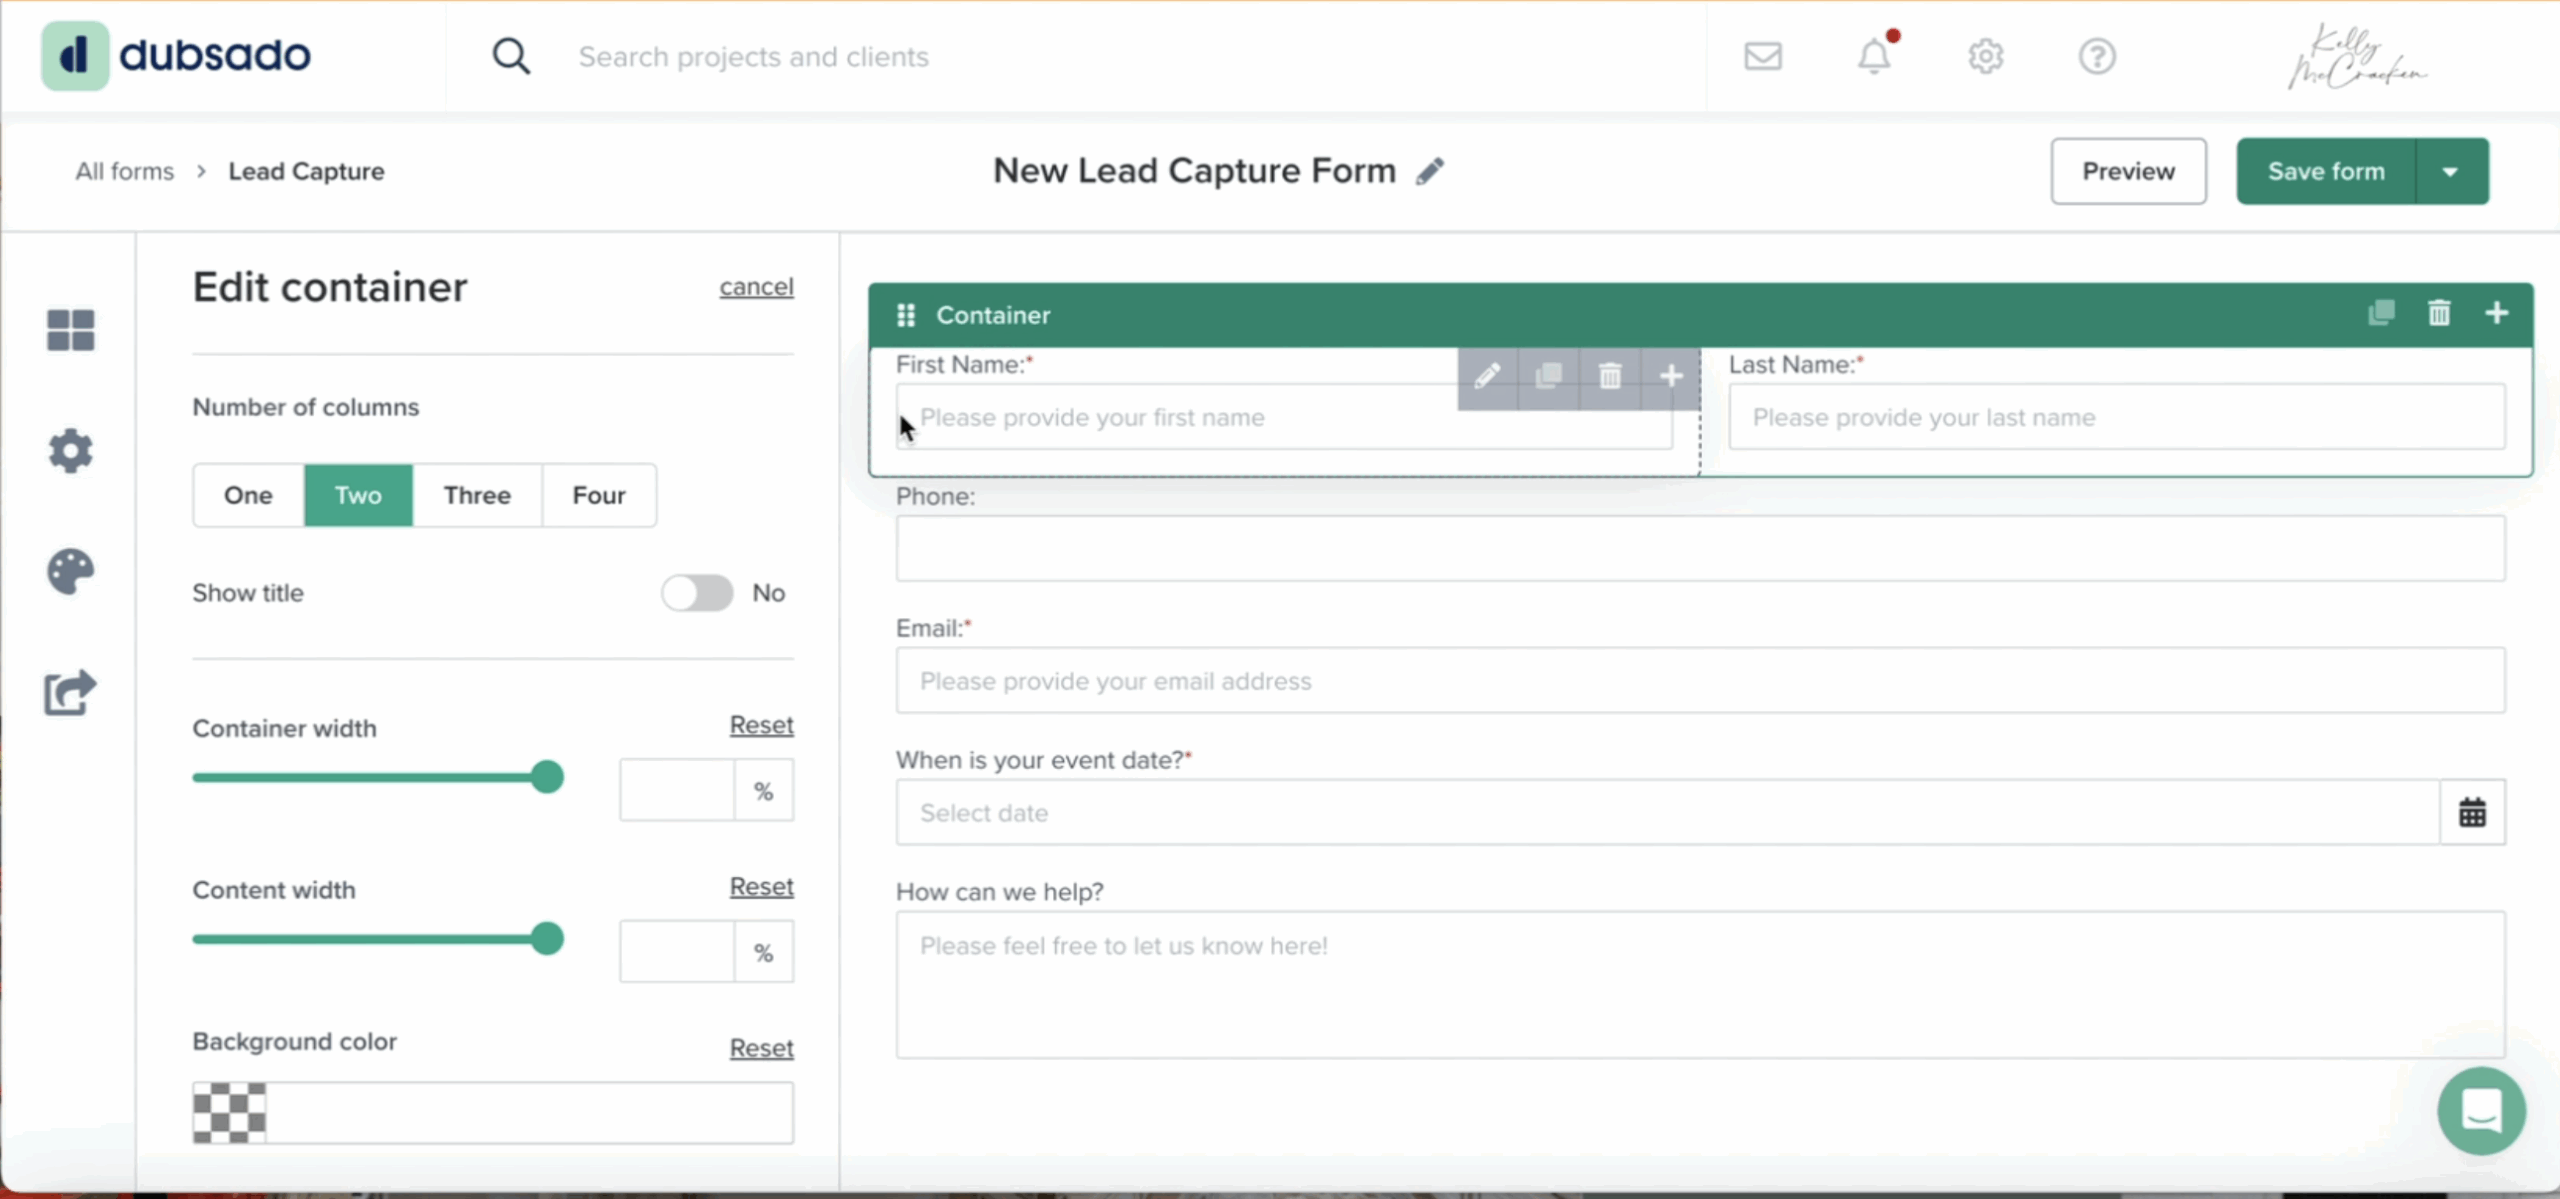
Containers allow you to split fields into columns (up to 4) and keep everything responsive on mobile. For example, placing First Name and Last Name side by side in a two-column container ensures they stay aligned across devices.
3. Choose Short Answer Fields
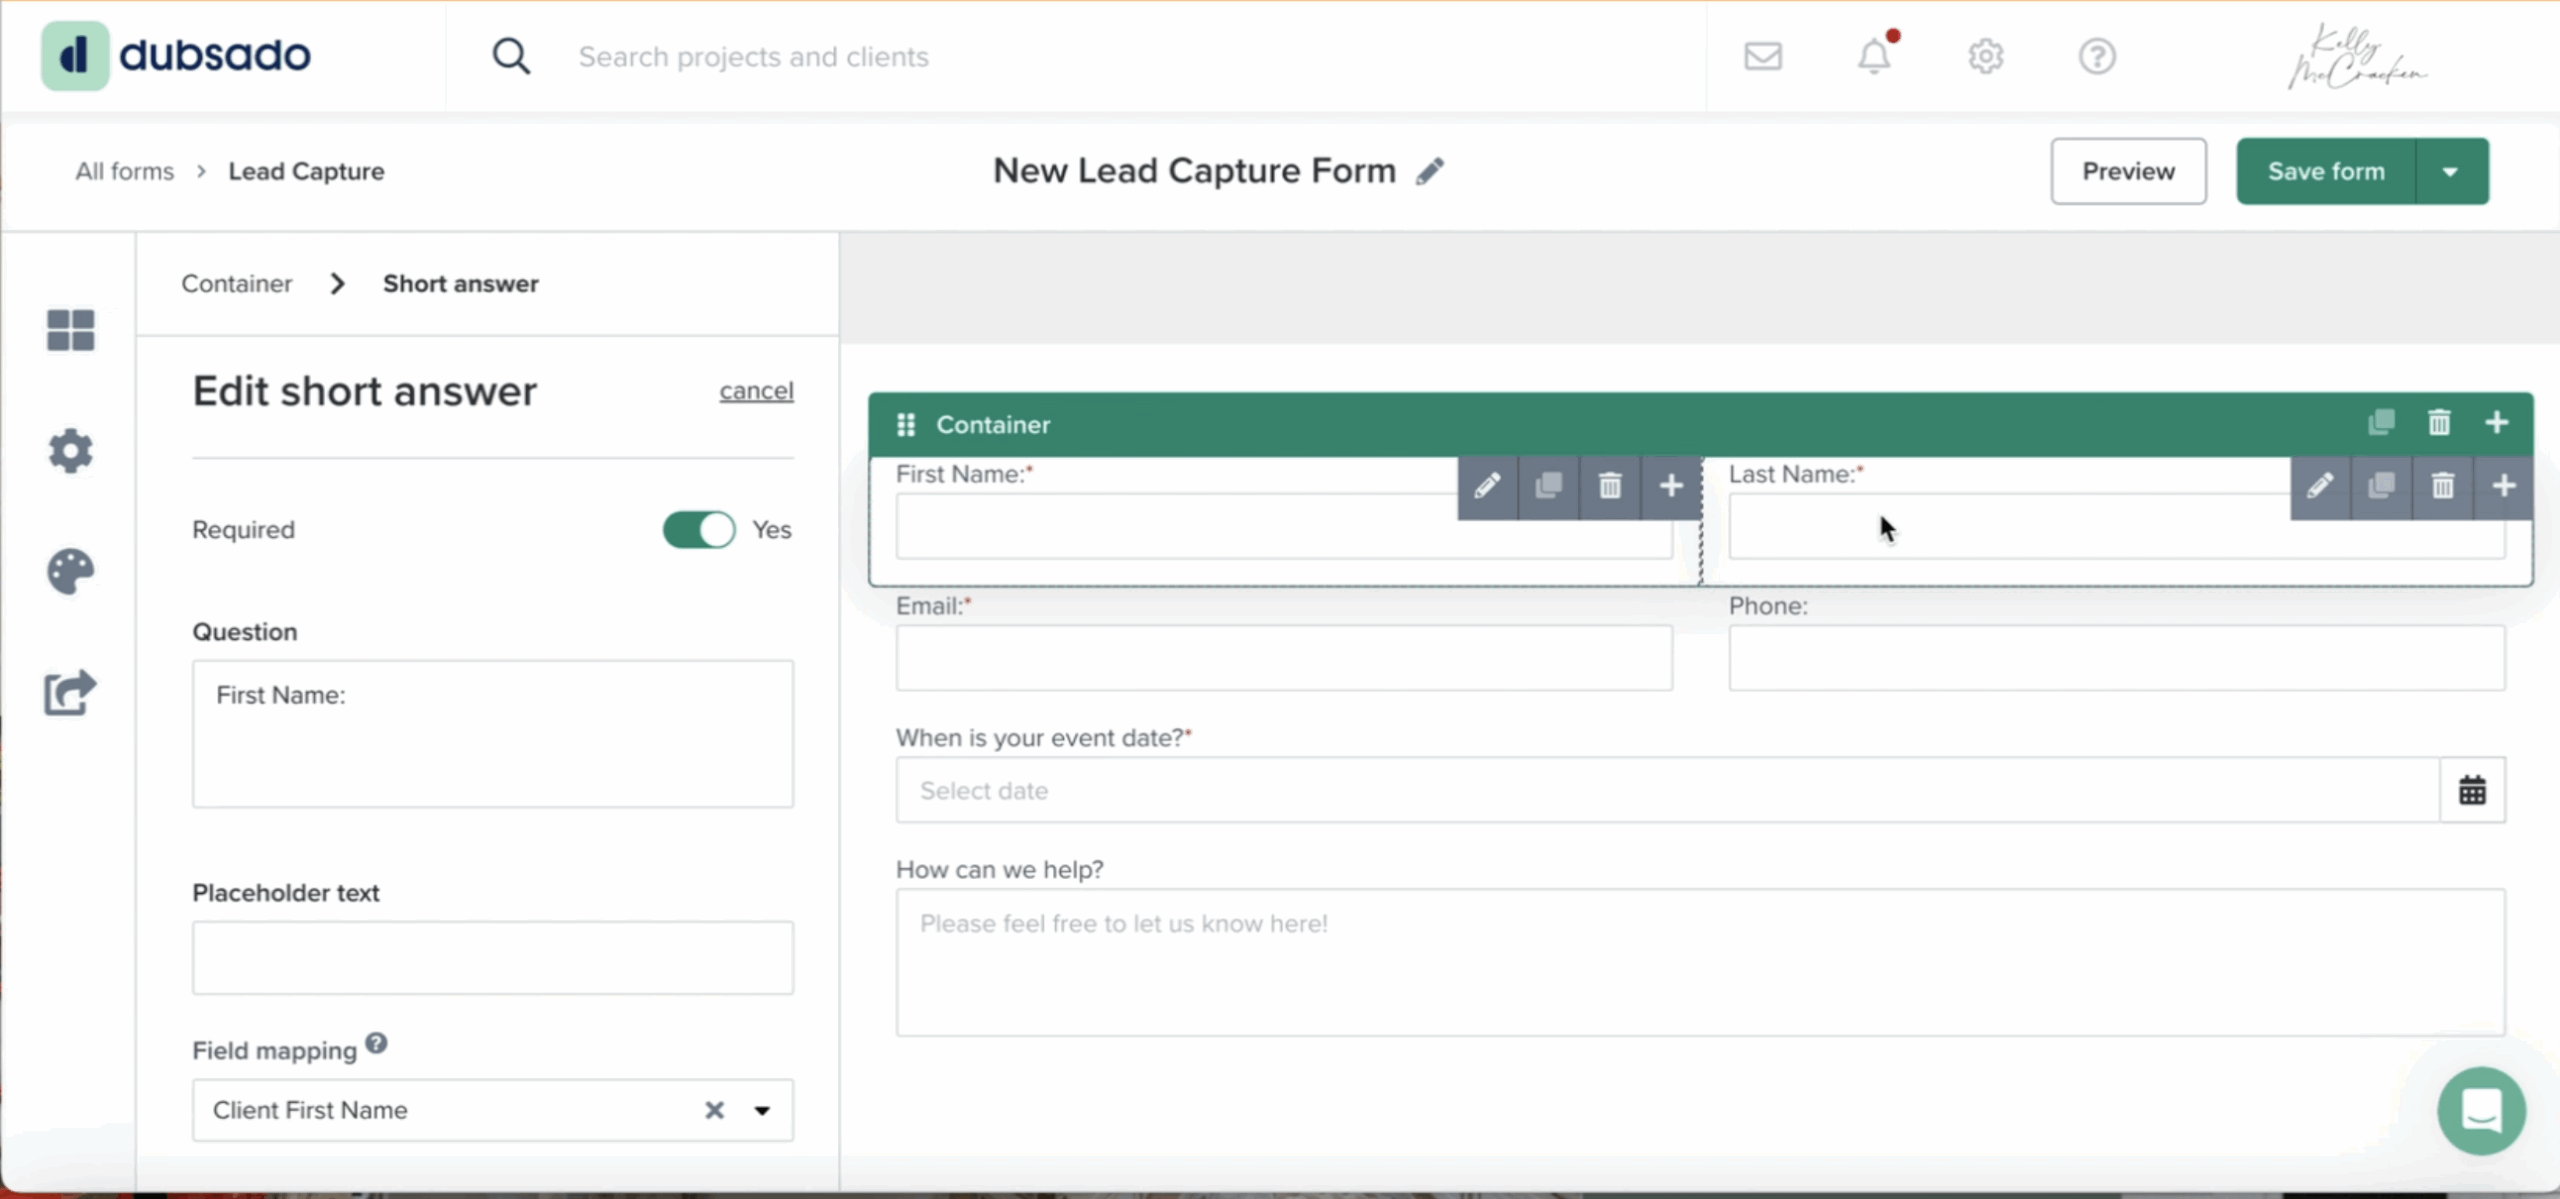
Stick to short answer fields whenever possible because they’re the only ones that allow field mapping. Avoid using “long answer” fields for information you’ll want to repurpose in your system later.
4. Separate First and Last Name
This is a mistake I see often. Always use separate fields for first and last names. Why? Because Dubsado’s field mapping relies on this separation to pull names into smart fields for emails, invoices, and project titles.
5. Add Key Details
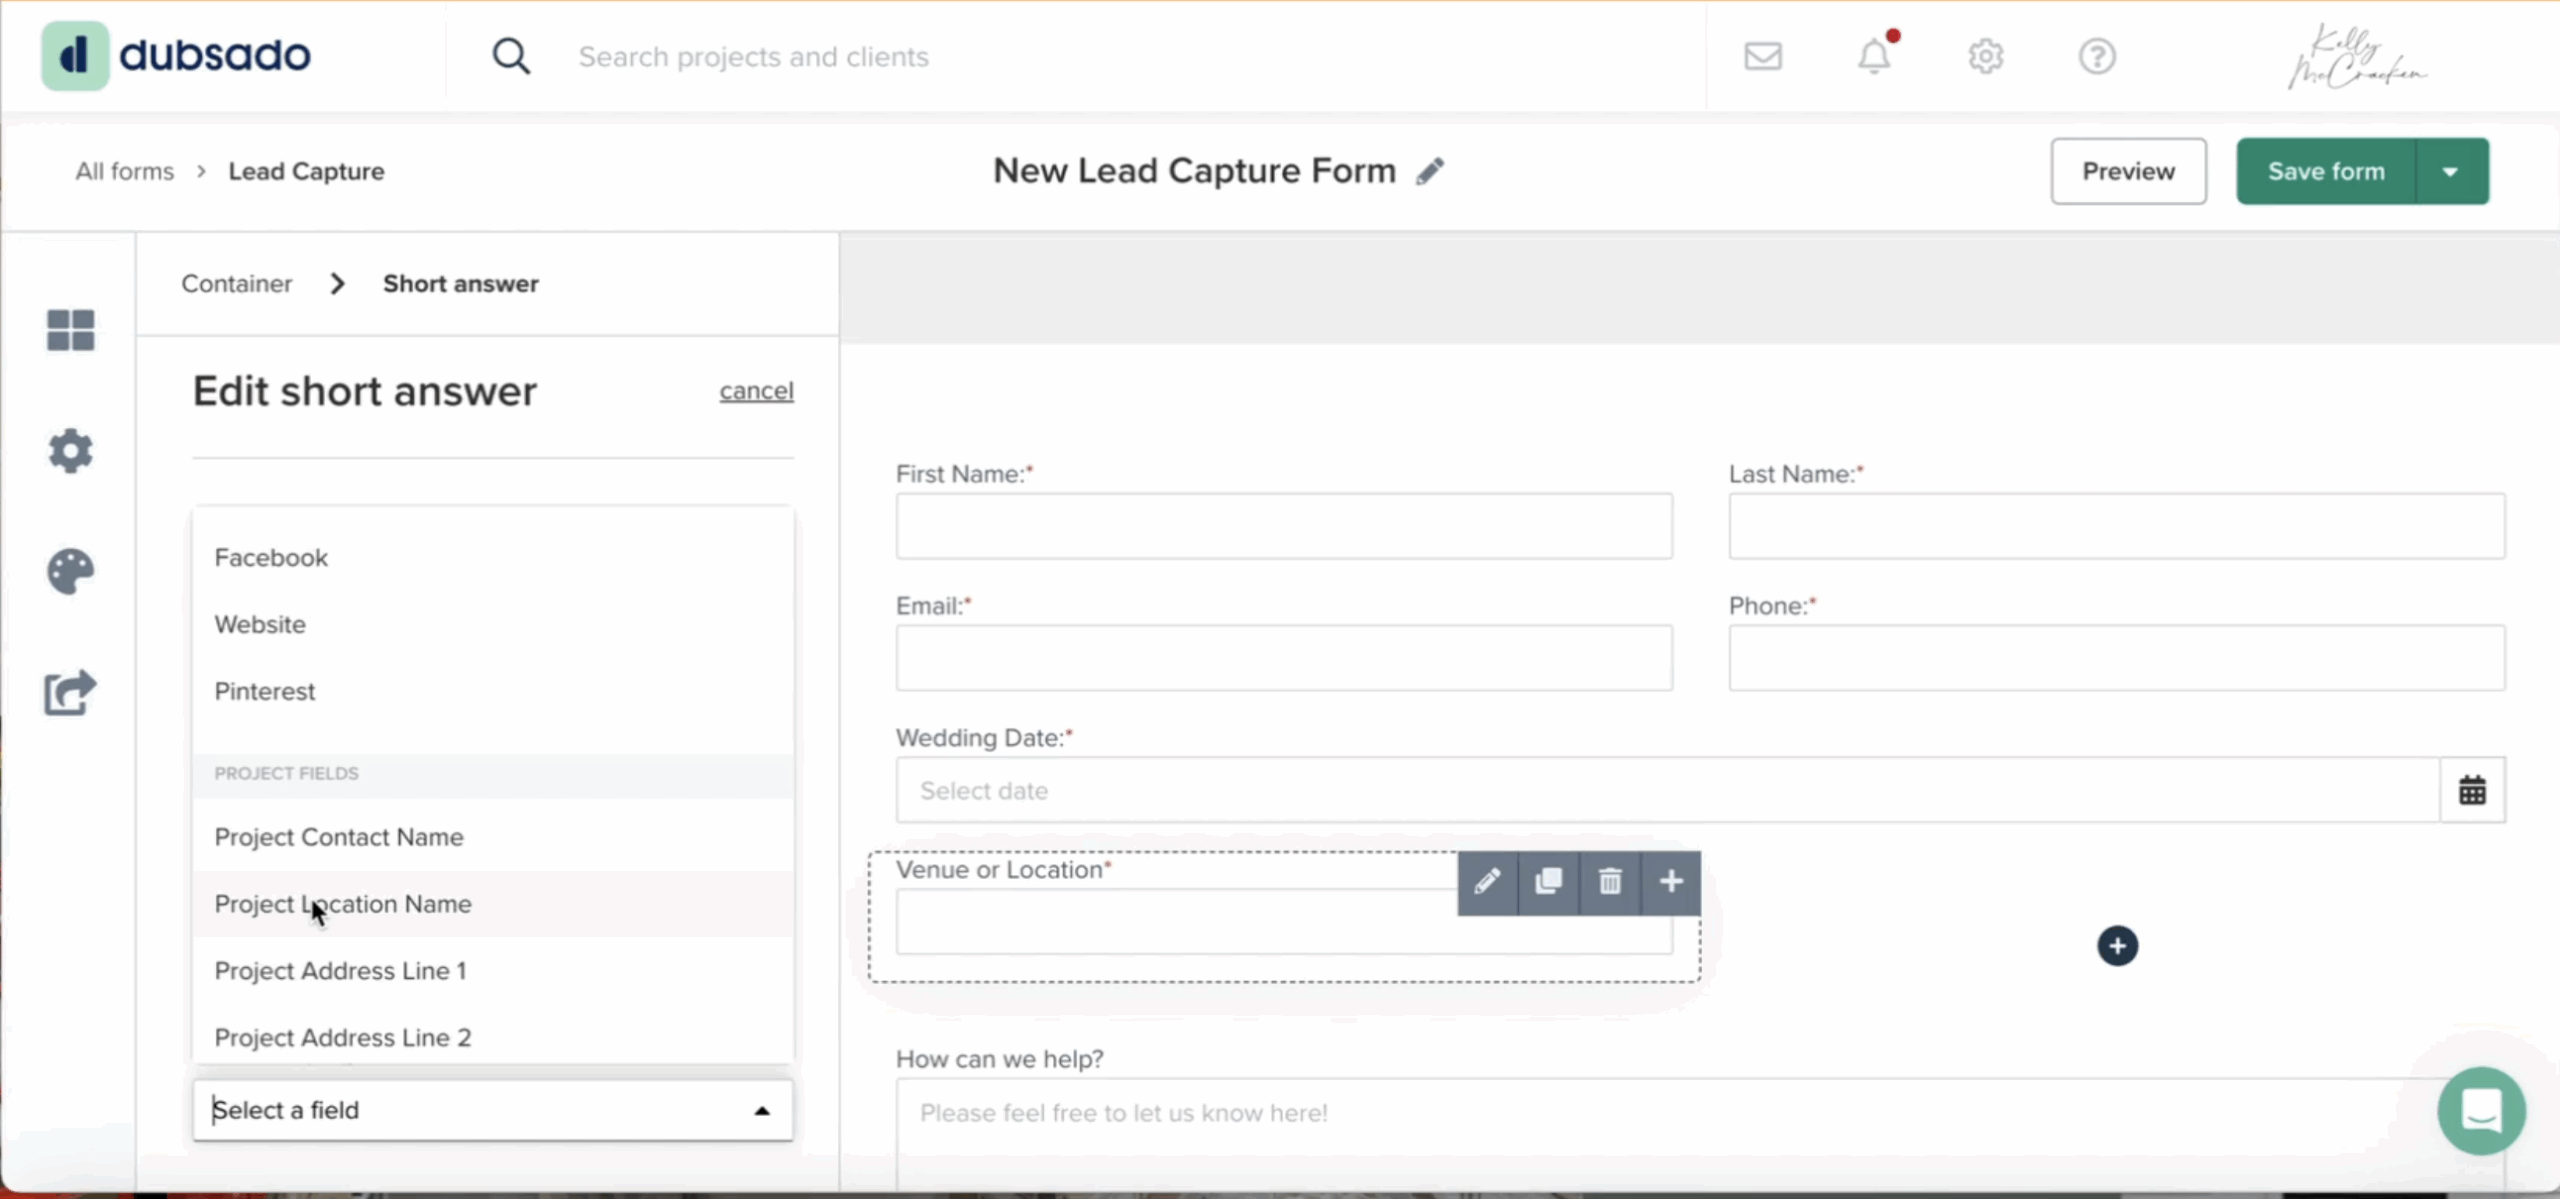
Depending on your business, here are a few commonly mapped fields to include:
- Email and phone number (required for communication).
- Project date (great for weddings, events, or any service tied to a date).
- Project location/venue (maps to “Project Location Name” in Dubsado).
- Custom mapped fields for unique details (e.g., guest count, service type).
Pro tip: Set up custom mapped fields under Settings → Custom Mapped Fields if you need to reference the same info across multiple documents and workflows.
6. Track Your Leads with Project Sources
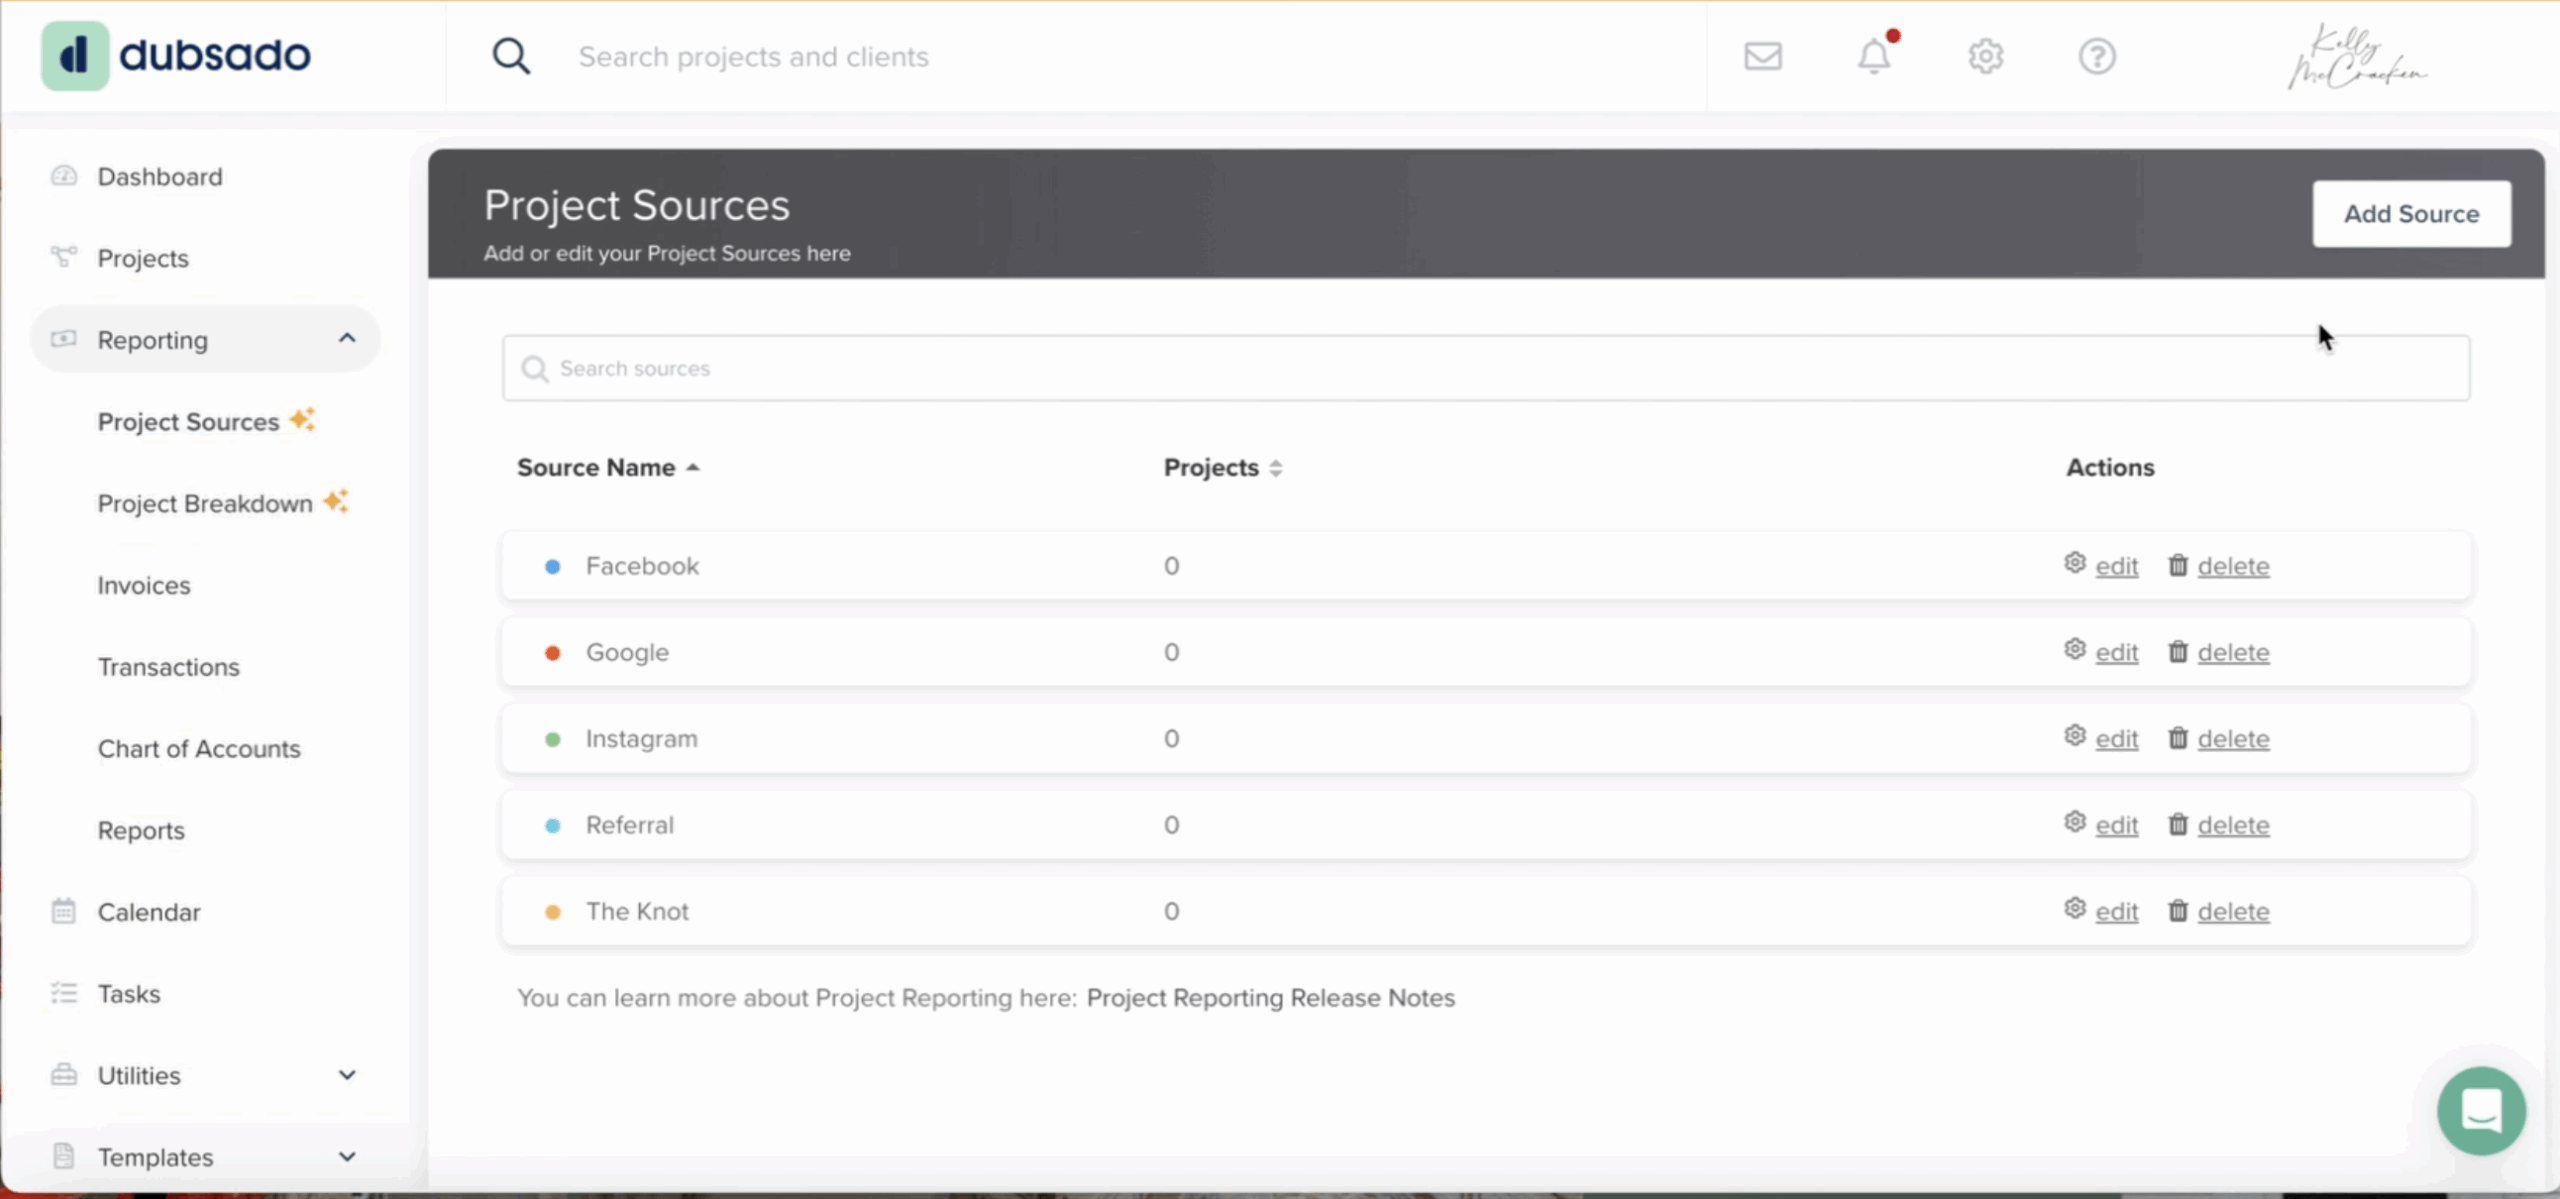
Instead of using a generic dropdown for “How did you find me?”, take advantage of Dubsado’s Project Sources.
First, set up your sources under Reporting → Project Sources (e.g., Instagram, Google, referrals). Then, add the Project Source field to your form. This allows you to track marketing ROI directly in your reports. I like to put them in rainbow order, just for fun!
7. Connect Workflows (Optional but the Goal!)
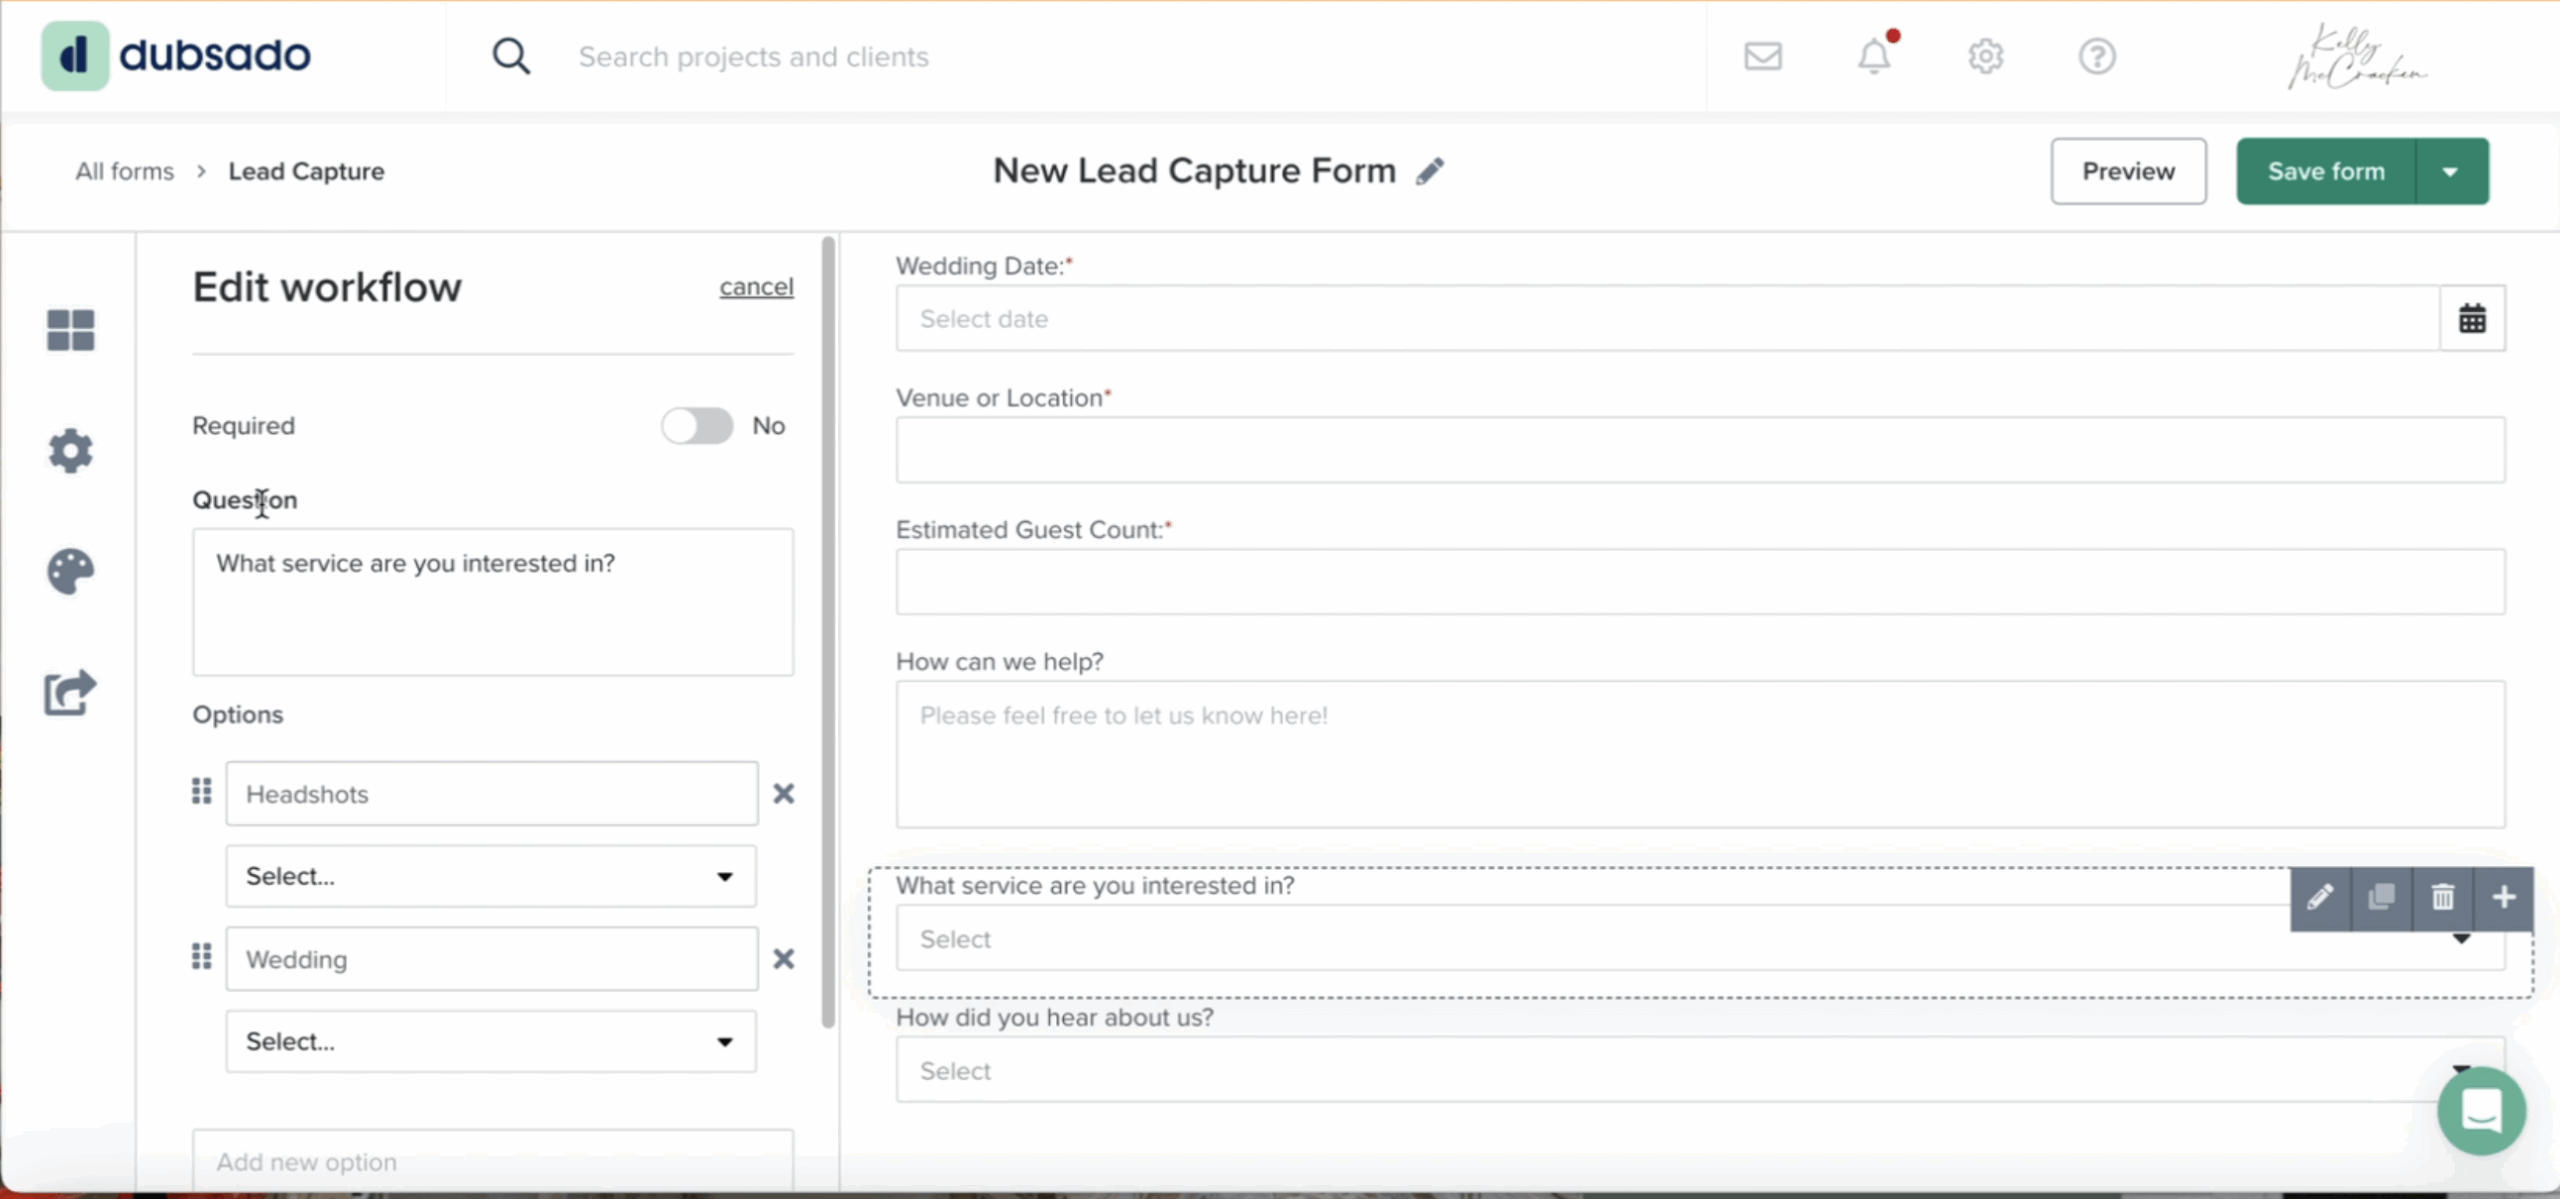
You can connect workflows two different ways directly to your lead capture form. This means when a client inquires, the right automated workflow can start instantly.
- Option 1: If all clients go through the same process → Assign one default workflow in the lead capture settings.
- Option 2: If you serve multiple service types → Use the workflow element selector to trigger different workflows based on what the client selects.
8. Customize the Thank-You Message
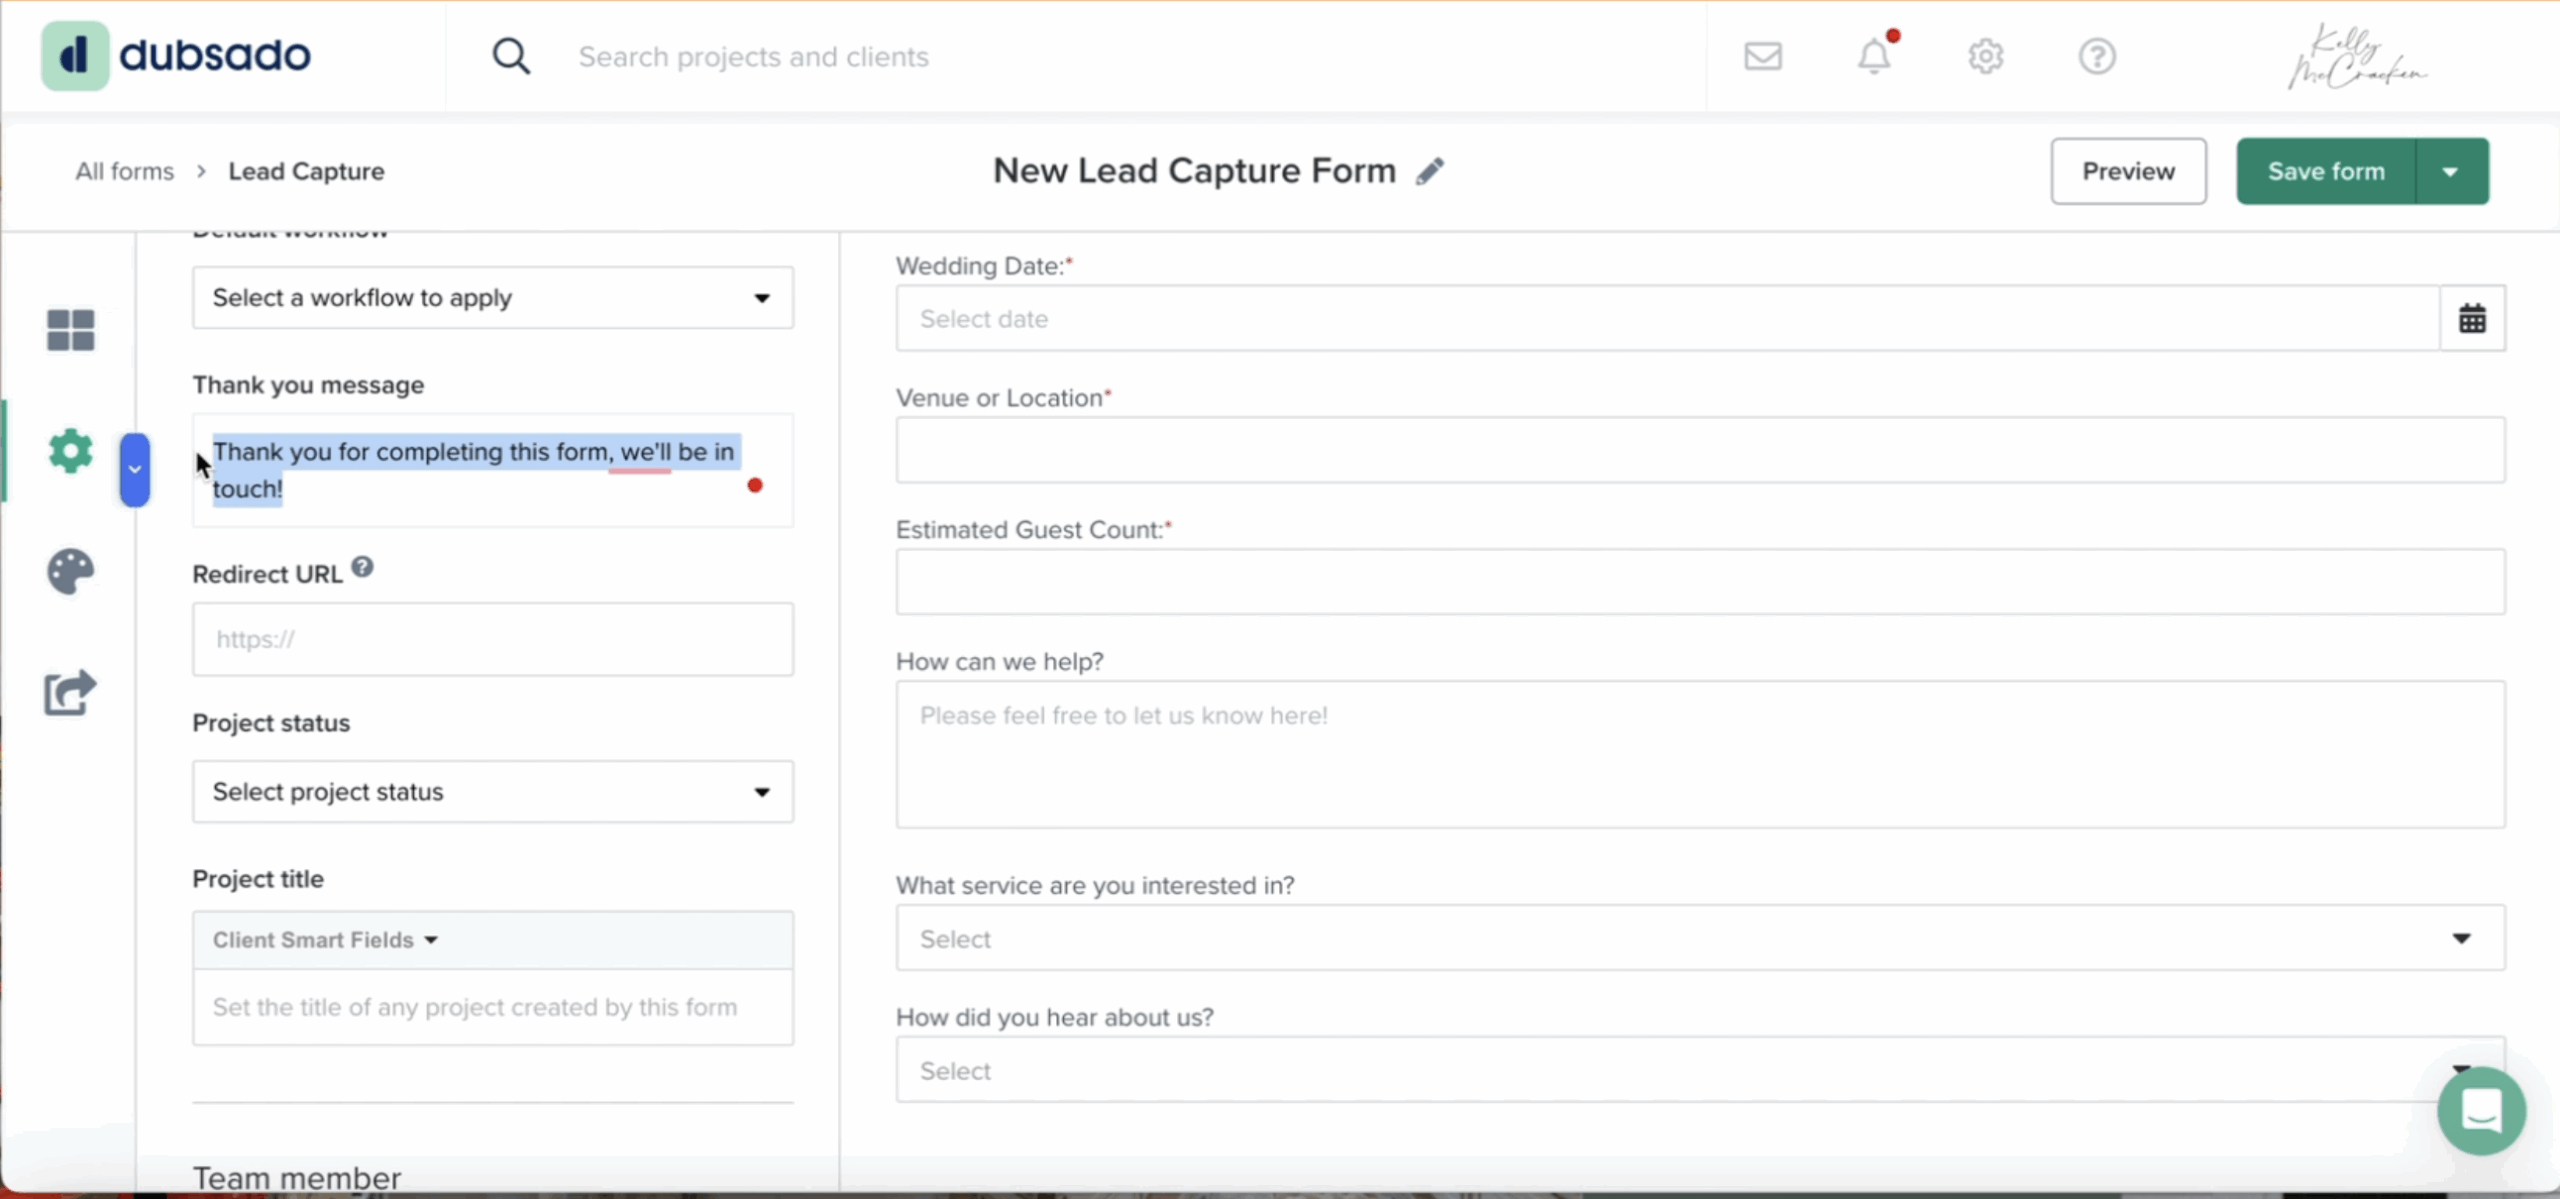
After submission, personalize the thank-you message so it feels warm and on-brand. You can even add an image (like your logo) to the message. Or you can redirect to a hidden webpage with a special message (or fun confetti animation, if that’s your vibe).
9. Set a Project Status and Project Title
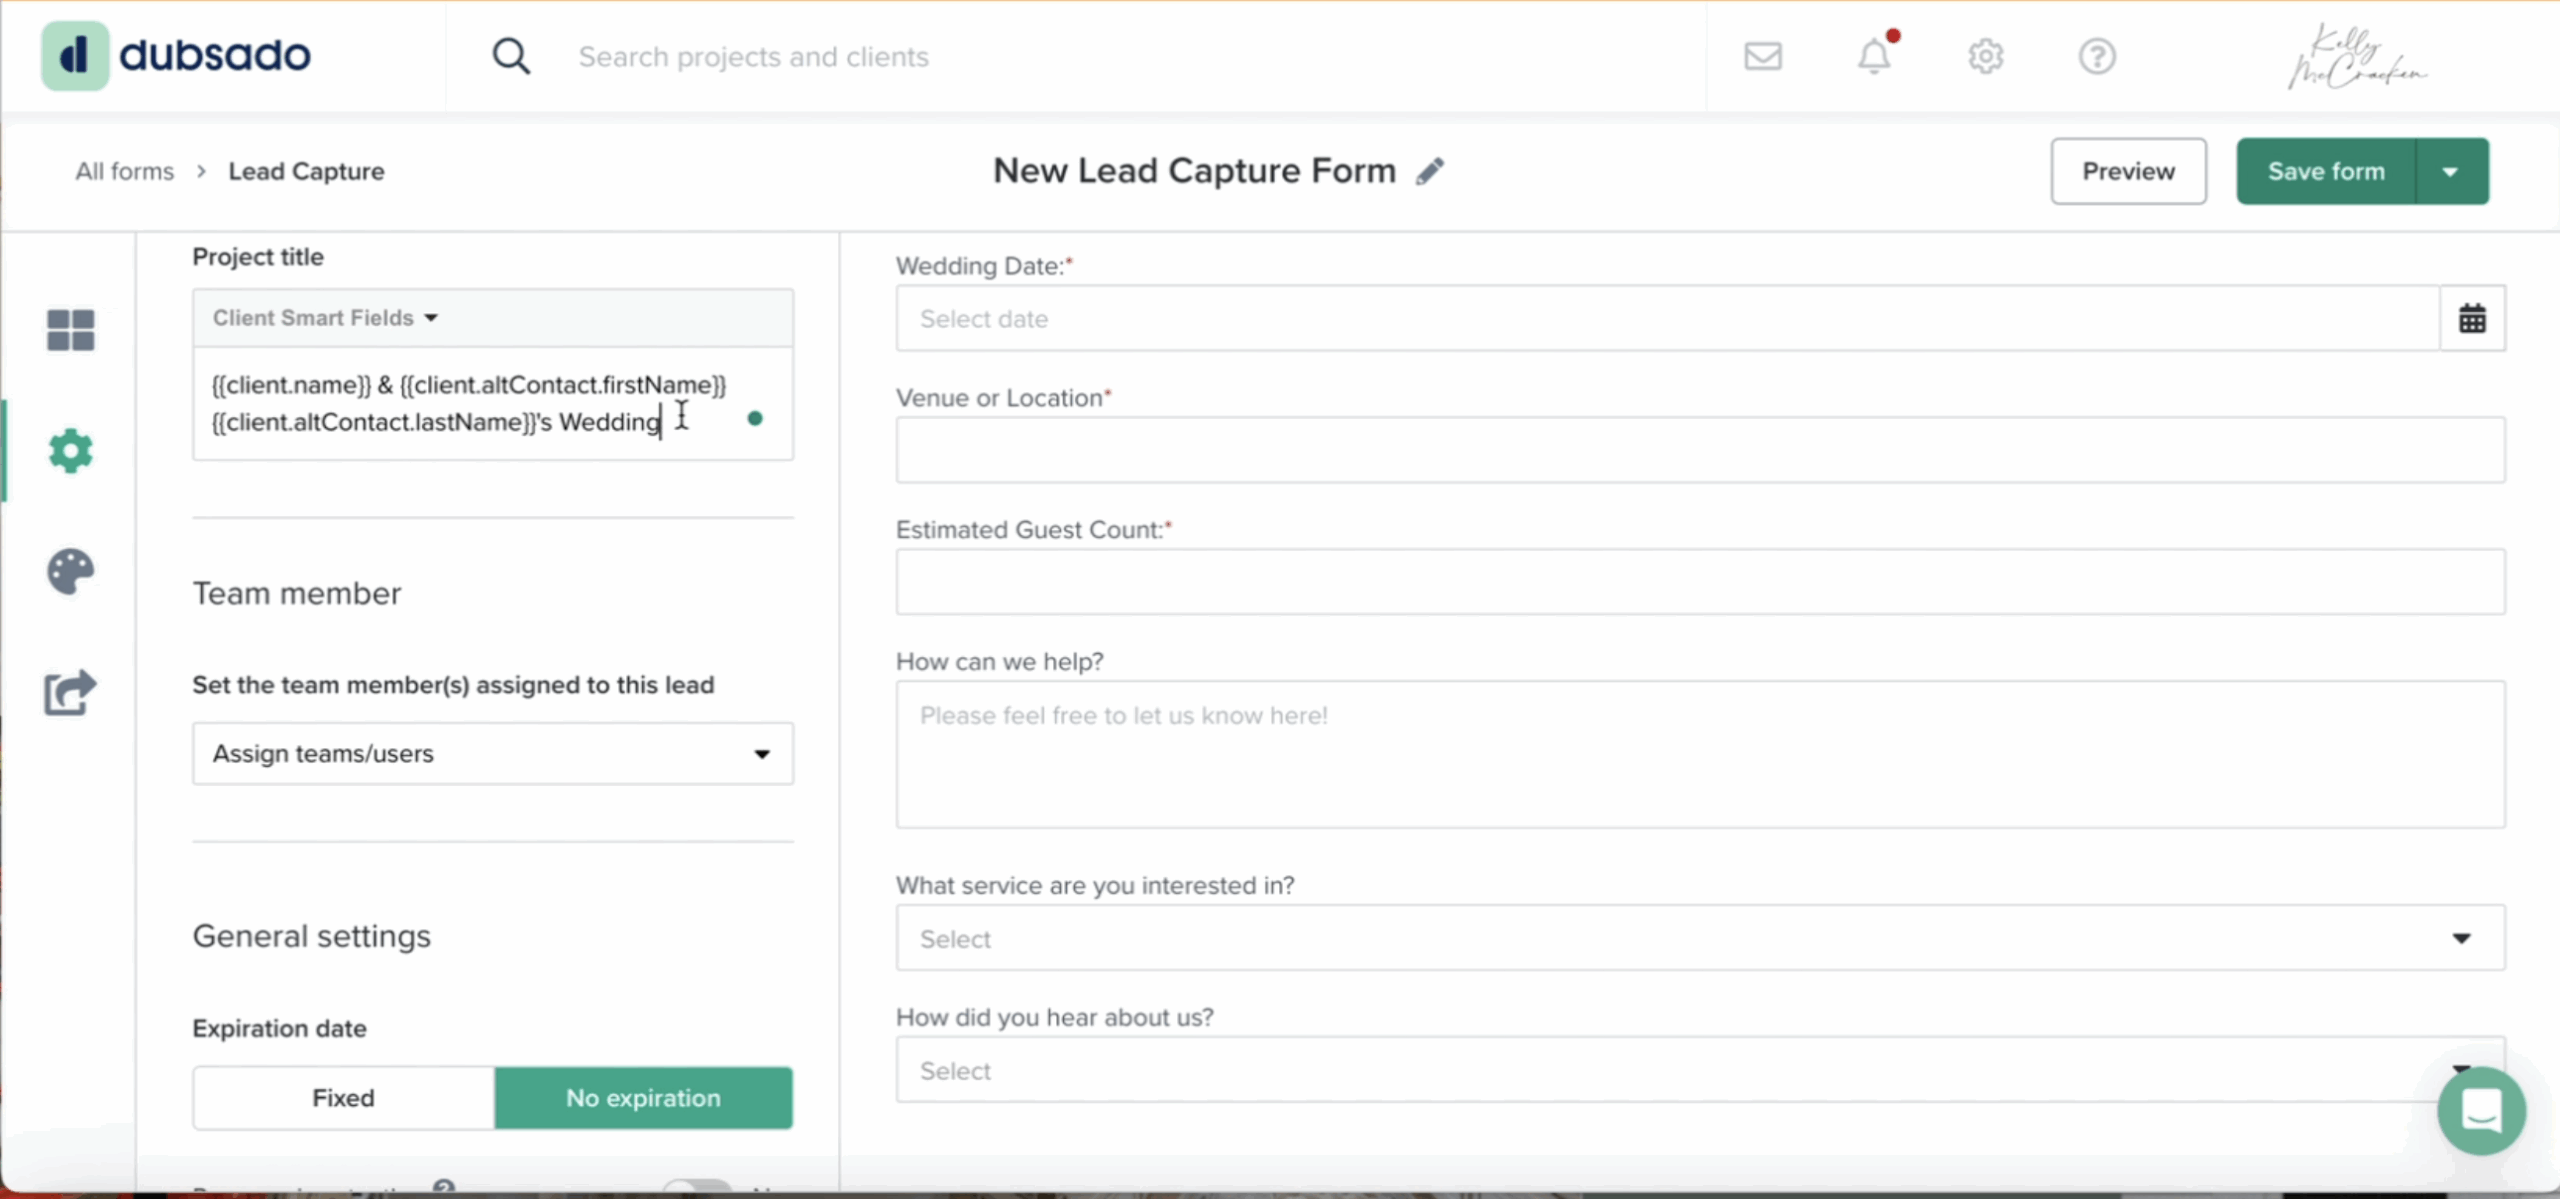
In the form settings, after you customize your thank you message or redirect, you’ll want to set a Project Status so new leads show up in your dashboard correctly. You can also customize your Project Title automatically with the information submitted in the fields like: “Client name & Client 2 Name Wedding” (Mary Johnson & Devon Bradford’s Wedding). But know that this will eventually be client-facing when they become a client so keep that in mind.
Best Practices for Lead Capture Forms in Dubsado
- Keep it short and straightforward. Only ask for what you need to determine if you’re a fit.
- Use clear labels, don’t make clients guess what to type.
- Customize your submit button text to make it personal (“Let’s Go!” or “I’m Ready”) in Form Styling
- Avoid expiration dates, keep your form live at all times.
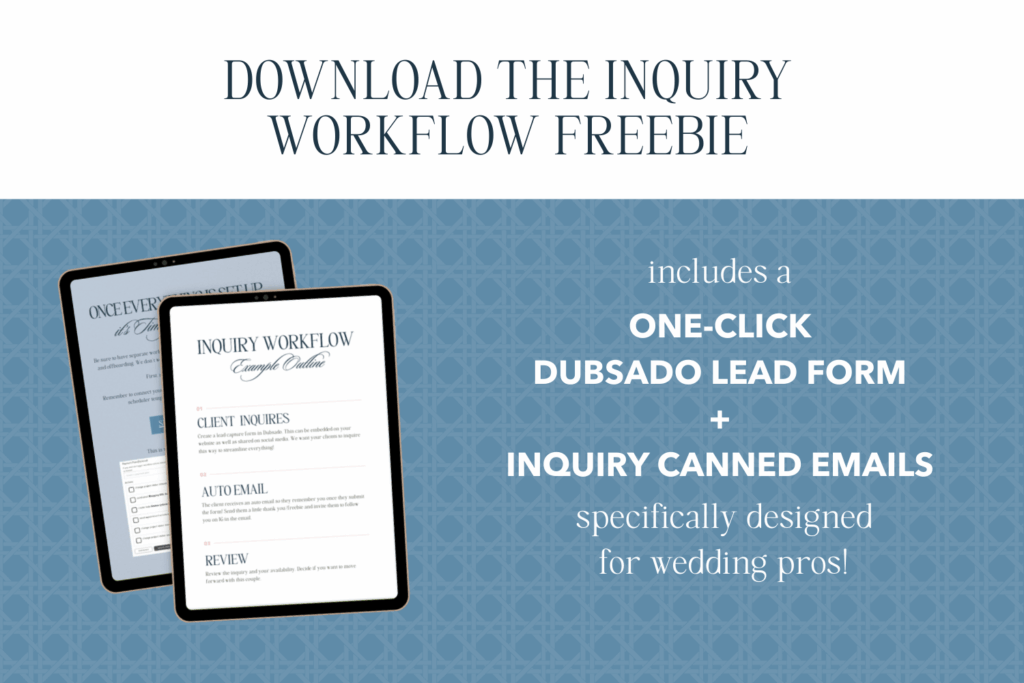
How to Set Up a Dubsado Lead Capture Form
Learning how to set up a lead capture form in Dubsado is one of the best investments you can make in your client process. A properly built form keeps your leads organized, saves you time, and sets the tone for a smooth client experience.
If you’d like hands-on help setting up your forms, or your entire Dubsado account, I’d love to work with you. I’m a Certified Dubsado Specialist, and I help service-based entrepreneurs simplify their systems so they can focus on their craft.
Get in touch with me here or find me on Instagram @kellymcracken.co.






Your expertise belongs in your craft more than your CRM. Bringing in a pro to do the strategic thinking and heavy lifting means that you’re never stuck Googling, experimenting, or muddling through something that only kind of works.
When you book a Dubsado setup for your business, we get to skip right over any implementation growing pains or learning just for learning’s sake. As a Certified Dubsado Specialist, I build exactly what you need, and then show you exactly what you need to do to keep the system running smoothly.
